
4 minutes
Written: 2020-03-16 00:06 +0000
Provisioning Dotfiles on an HPC
Background
My dotfiles turned 4 years old a few months ago (since 9th Jan 2017) and remains one of my most frequently updated projects for obvious reasons. Going through the changes reminds me of a whole of posts I never got around to writing.
Anyway, recently I gained access to another HPC cluster, with a standard configuration (bash, old CentOS) and decided to track my provisioning steps. This is really a very streamlined experience by now, since I’ve used the same setup across scores of machines. This is actually also a generic intro to configuring user setups on HPC (high performance cluster) machines, if one is inclined to read it in that manner. To that end, sections of this post involve restrictions relating to user privileges which aren’t normally part of most Dotfile setups.
Aside
- Dotfiles define most people who maintain them
- No two sets are ever exactly alike
- They fall somewhere between winging it for each machine and using something like Chef or Ansible
- Tracking dotfiles is really close to having a sort of out-of-context journal
Before I settled on using the fabulous dotgit, I considered several alternatives, most notably GNU stow.
Preliminaries
It is important to note the environment into which I had to get my setup.
SSH Setup
- The very first thing to do is to use a new
ssh-key
1export myKey="someName"
2ssh-keygen -f $HOME/.ssh/$myKey
3# I normally don't set a password
4ssh-add $HOME/.ssh/$myKey
5ssh-copy-id $myHPC
6# myHPC being an IP address
I more often than not tend to back this up with a cutesy alias, also because I
do not always get my username of choice on these machines. So in
$HOME/.ssh/config I use:
1Host myHPC
2 Hostname 127.0.0.1
3 User somethingIgot
4 IdentityFile ~/.ssh/myKey
Harvesting Information
- I normally use neofetch on new machines
1mkdir -p $HOME/Git/Github
2cd $HOME/Git/Github
3git clone https://github.com/dylanaraps/neofetch.git
4cd neofetch
5./neofetch
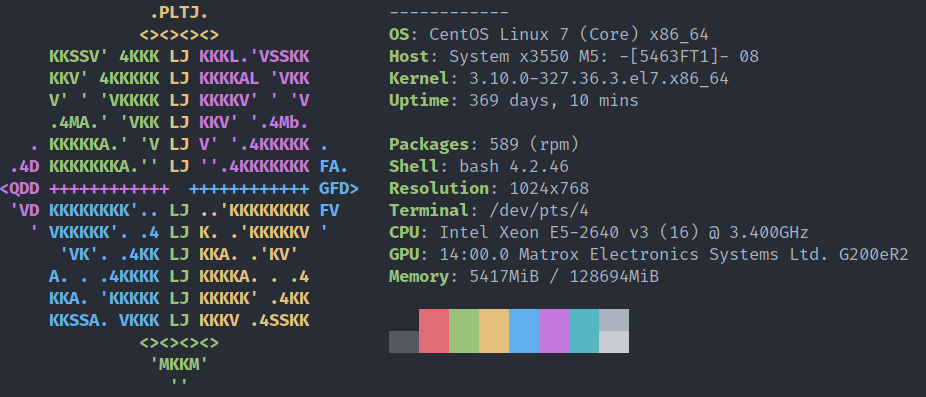
Figure 1: Neofetch Output
Where the top has been tastefully truncated. Just for context, the latest bash
as of this writing is v5.0.16 so, that’s not too bad, given that neofetch
works for bash ≥ 3.2
TODO Circumventing User Restrictions with Nix
- A post in and of itself would be required to explain why and how users are normally restricted from activities in cluster nodes
- Here, we leverage the nix-package management system to circumvent these
- User installation of
nixis sadly non-trivial, so this might be of some use1
Testing nix-user-chroot
- We will first check namespace support
1# Errored out
2unshare --user --pid echo YES
3# Worked!
4zgrep CONFIG_USER_NS /boot/config-$(uname -r)
5# CONFIG_USER_NS=y
Thankfully we have support for namespaces, so we can continue with nix-user-chroot.
- Since we definitely do not have
rustuporrustcon the HPC, we will use a prebuilt binary ofnix-user-chroot
1cd $HOME && wget -O nix-user-chroot https://github.com/nix-community/nix-user-chroot/releases/download/1.0.2/nix-user-chroot-bin-1.0.2-x86_64-unknown-linux-musl
- Similar to the wiki example, we will use
$HOME/.nix
1cd ~/
2chmod +x nix-user-chroot
3mkdir -m 0755 ~/.nix
4./nix-user-chroot ~/.nix bash -c 'curl https://nixos.org/nix/install | sh'
- Only, this doesn’t work
Turns out that since unshare is too old, nix-user-chroot won’t work either.
Using PRoot
PRoot is pretty neat in general, they even have a nice website describing it.
- Set a folder up for local installations (this is normally done by my Dotfiles, but we might as well have one here too)
1mkdir -p $HOME/.local/bin
2export PATH=$PATH:$HOME/.local/bin
- Get a binary from the GitLab artifacts
1cd $HOME
2mkdir tmp
3cd tmp
4wget -O artifacts.zip https://gitlab.com/proot/proot/-/jobs/452350181/artifacts/download
5unzip artifacts.zip
6mv dist/proot $HOME/.local/bin
- Bind and install
nix
1mkdir ~/.nix
2export PROOT_NO_SECCOMP=1
3proot -b ~/.nix:/nix
4export PROOT_NO_SECCOMP=1
5curl https://nixos.org/nix/install | sh
If you’re very unlucky, like I was, you may be greeted by a lovely little error message along the lines of:
1/nix/store/ddmmzn4ggz1f66lwxjy64n89864yj9w9-nix-2.3.3/bin/nix-store: /opt/ohpc/pub/compiler/gcc/5.4.0/lib64/libstdc++.so.6: version `GLIBCXX_3.4.22' not found (required by /nix/store/c0b76xh2za9r9r4b0g3iv4x2lkw1zzcn-aws-sdk-cpp-1.7.90/lib/libaws-cpp-sdk-core.so)
Which basically is as bad as it sounds. At this stage, we need a newer compiler
to even get nix up and running, but can’t without getting an OS update. This
chicken and egg situation calls for the drastic measure of leveraging brew
first2.
1sh -c "$(curl -fsSL https://raw.githubusercontent.com/Linuxbrew/install/master/install.sh)"
Note that nothing in this section suggests the best way is not to lobby your
sys-admin to install nix system-wide in multi-user mode.
Giving Up with Linuxbrew
- Somewhere around this point, linuxbrew is a good idea
Shell Stuff
zsh is my shell of choice, and is what my Dotfiles expect and work best with.
- I did end up making a quick change to update the
dotfileswith a target which includes a snippet to transition tozshfrom the defaultbashshell
Dotfiles
The actual installation steps basically tracks the readme instructions.
1git clone https://github.com/kobus-v-schoor/dotgit.git
2mkdir -p ~/.bin
3cp -r dotgit/old/bin/dotgit* ~/.bin
4cat dotgit/old/bin/bash_completion >> ~/.bash_completion
5rm -rf dotgit
6# echo 'export PATH="$PATH:$HOME/.bin"' >> ~/.bashrc
7echo 'export PATH="$PATH:$HOME/.bin"' >> ~/.zshrc
Much of this section is directly adapted from the NixOS wiki ↩︎
This used to be called linuxbrew, but the new site makes it clear that it’s all one
brewnow. ↩︎
![]()